Install and config Pritunl Zero
Pritunl Zero is a zero trust system that provides secure authenticated access to internal services from untrusted networks without the use of a VPN.
Service can be ssh web in this article we will see how to implement pritunl zero in environment with docker and Traefik.

Pritunl Zero installation
Our environment is a hosted web server with Traefik as proxy , Pritunl will be installed in a container with docker-compose.
Let’s take a look to the docker-compose file :
version: "3.7"
services:
 traefik:
    image: traefik
    restart: always
    ports:
      - "80:80"
      - "443:443"
    volumes:
      - "/var/run/docker.sock:/var/run/docker.sock:ro"
      - "./traefik/letsencrypt:/letsencrypt"
    command:
      - "--providers.docker=true"
      - "--providers.docker.exposedbydefault=false"
      - "--entrypoints.web.address=:80"
      - "--entrypoints.websecure.address=:443"
      - "--certificatesresolvers.mysmartserver.acme.dnschallenge=true"
      - "--certificatesresolvers.mysmartserver.acme.dnschallenge.provider=provider"
    environment:
      - "PROVIDER_ENDPOINT="
      - "PROVIDER_APPLICATION_KEY="
      - "PROVIDER_APPLICATION_SECRET="
      - "PROVIDER_CONSUMER_KEY="
 pritunl:
   image: "pritunl/pritunl-zero:latest"
   links:
     - pritunldb
   environment:
     - "MONGO_URI=mongodb://pritunldb:27017/pritunl-zero"
     - "NODE_ID=5b8e11e4610f990034635e98"
   ports:
     - '81:80'
     - '4444:4444'
     - '444:443'

   labels:
     - "traefik.enable=true"
     - "traefik.http.routers.traefikforward.tls.certresolver=mysmartserver"
     - "traefik.http.routers.pritunl.entrypoints=websecure,web"
     - "traefik.http.routers.pritunl.rule=Host(`zero.mysmartserver.com`)"
     - "traefik.http.routers.pritunl.rule=Host(`zero-users.mysmartserver.com`)"

 pritunldb:
   image: 'mongo'
   container_name: 'pritunldb'
   environment:
     - MONGO_INITDB_DATABASE="pritunl-zero"
     - MONGO_USER="mongo"
     - MONGO_PASS="password"
   ports:
     - '27017:27017'
   volumes:
     - mongo-data:/data/db


volumes:
 mongo-data:
The Traefik container listens on the HTTP and HTTPS ports of the server and also generates the SSL certificate with let’s encrypt.
In the environment section we set the dns provider information for let’s encrypt.
Pritunl should be available on the HTTP and HTTPS ports but they are already used with Traefik.
We put these ports behind 81 and 444 the port 4444 is not required but we will use it later.
The container is linked to a mongo db database where we create a pritunl-zero db, Node ID represents the instance pritunl zero.
The labels section is lanaged through traefik , we add 2 routes to join the server :
- zero.mysmartserver.com
- zero-users.mysmartserver.com
That mean we will create two ssl ssl certificates for these two records.
Finally the pritunldb is hosted with a mongodb container available on the classic ports 27017.
We store the db to a volume on the host.
Configure Web service with Pritunl Zero
Once the docker-compose up the pritunl instance is available on zero.pritunl.mysmartserver.com:444
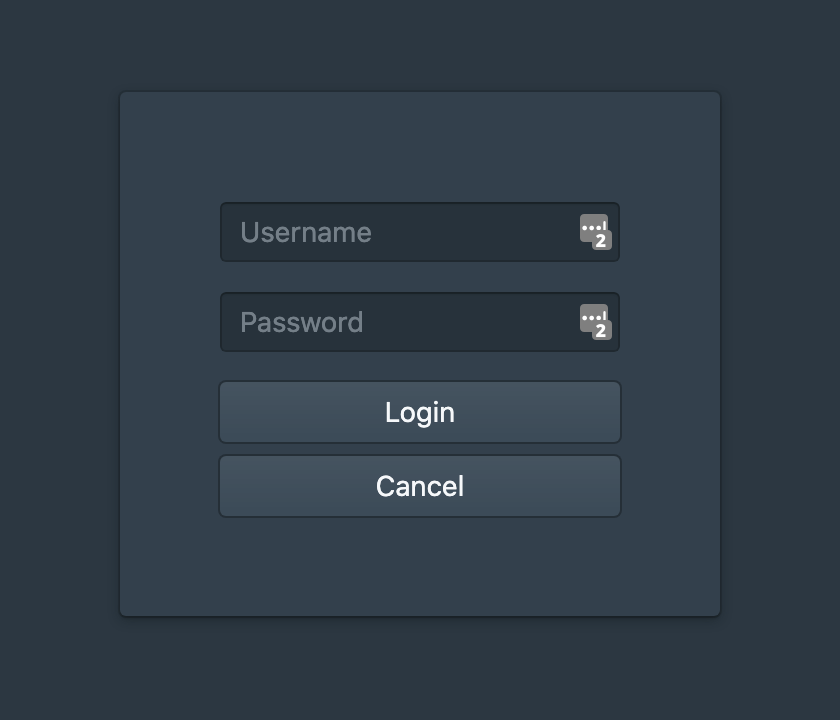
Pritunl zero ask for login/password
Generate the password with the command pritunl-zero default-password for a docker connect on the instance with the command docker exec.

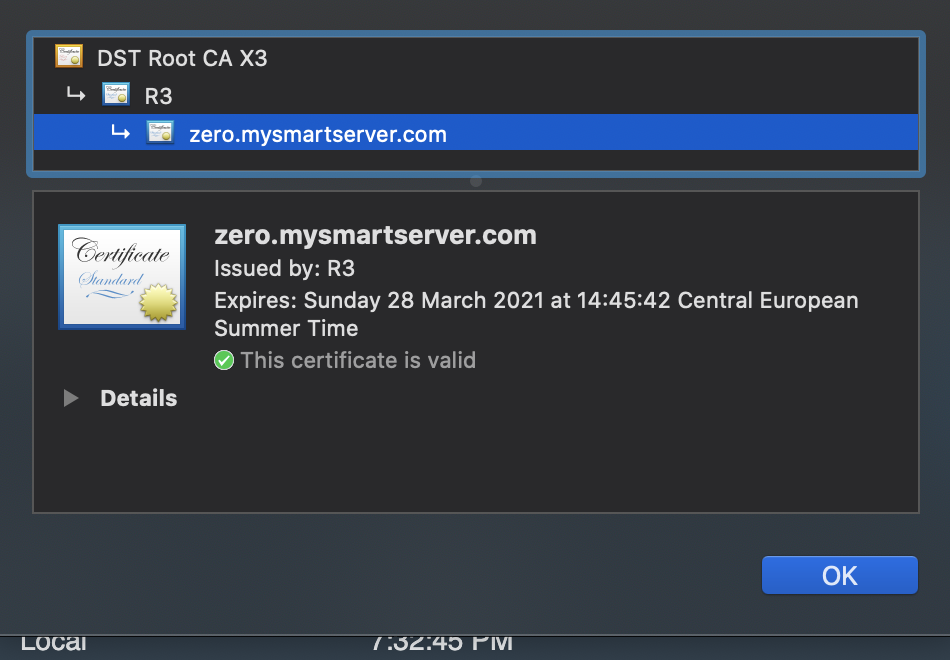
Connect on the interface and click on Certificates to set the certificates used through pritunl.
Note At this step your pritunl instance pushes an invalid certificate.
The purpose is to generate certificates for the admin console but also for service or user interface for ssh access.
If you are using lets encrypt directly from traefik you can generate the certificates from acme.json and upload them to pritunl.
The jq command will help you to generate the certificates and the key :
cat acme.json | jq -r ‘.[].Certificates[] | select(.domain.main== »‘zero.mysmartserver.com' ») | .certificate’ | base64 -d > zero.mysmartserver.com.crt
cat acme.json | jq -r ‘.[].Certificates[] | select(.domain.main== »‘zero.mysmartserver.com' ») | .key’ | base64 -d > zero.mysmartserver.com.key
Once the certificates and the key generated copy them on the instance.
Two options are available for certificate use let’s encrypt from pritunl or copy the certificate directly on the instance.
For let’s encrypt your server will have to be available from 80 and 443 ports.

Certificates text set will be available like this :

The next step is to configure the node parameters

Management is the pritunl admin console
User is used if you want connect to ssh server from pritunl
Proxy service allow you to join an internal HTTP/HTTPS ressources from the web
Bastion allows you to implement a layer to access your server from ssh.
It’s a secure way to access your server without VPN , it also allows you to add mfa for contextual response in a zero trust environment.

For the example we chose to set a proxy service to reach an internal resource from HTTP/HTTPS.
Enable Management and Proxy and enter the management Name.
For this example I changed the management port to 4444 to align it on the container port.
My server will be available to 4444 instead of 443 already used with traefik.
Add the generated certificate and save.
You should reach your server to the 4444 ports on the management url

The generated certificates are correctly used on the server now
Go to the Services tab from the admin console and click on New
Indicate an external domain ( depending on your record but it’s not mandatory to indicate a host).
On the internal server indicate the internal resource you want to join , for example I add the container Ip and the port I want to reach.
Add a role and click on save.

Back to the Nodes tab select the service, add it and save your configuration.

Finally go to the Users tab and add a user with the same role created on the service
You have to enter the same roles as the service to allow the user.
The type user can be user from an IDP provider , IDP user can use the MFA (note SSO and MFA are not free on pritunl zero https://zero.pritunl.com/#pricing).

Once saved, go to the service external domain , you should land to a pritunl login page with the correct ssl certificate.


Connect the user previously created , you should be redirected to the server reached

Your internal service is now available from pritunl zero and internet. If you want to add policies or mfa rules you can create policies that you can assign to specific roles and services.
The policy can help you to restrict the service to networks or add specific parameters to match for a service.
